ACCESS Tutorial

In this tutorial you will create a simple one table Access Database. You will create a form for data entry and two queries. (Note: images shown below are from Access 2007 which is very similar in appearance to Excel 2010.)

STEP 1 - Starting Access, creating a Database file and a Table:

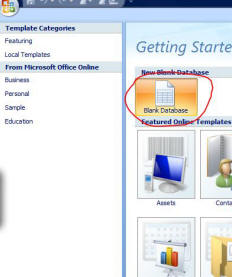
  • Launch the Access 2007
  • Click the Blank Database button
  • On the right side of the page, type Roster.accdb in the File Name: textbox
  • Click the open folder icon to bring up the "Save As" dialog box
  • Save the Roster.accdb file on your thumb drive
  • Click the Create button to bring up the next screen
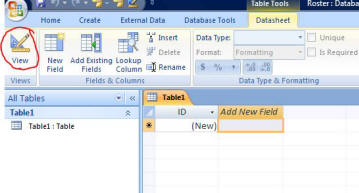
  • This shows the new database in Table View
  • Change to Design View by clicking the Design View button
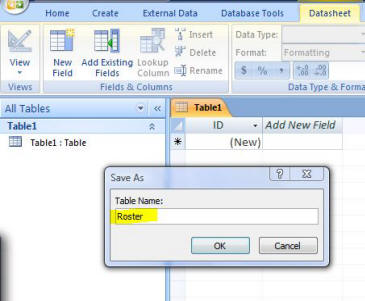
  • When the dialog box to name the table comes up
  • Enter Roster and click the OK button to bring the table up in Design View
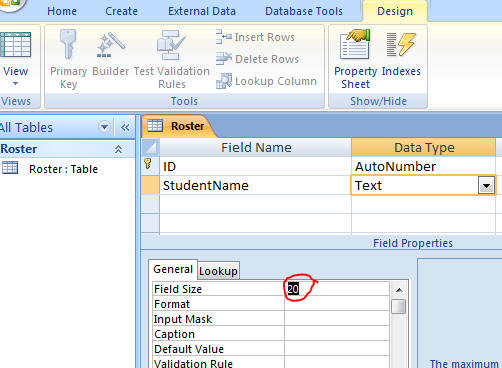
  • The first field (ID) has already been set up as an AutoNumber Data Type field and will provide each record occurrence a different unique number for identification purposes
  • In the second row of the Field Name column, type StudentName
  • Press the <Enter> key or the right arrow key to move to the Data Type column
  • Note that it displays Text
  • Change the Field Size on the General tab to 20, as shown. This will allow the user to enter as many as 20 characters for the Student's Name
  • Complete the Table Structure by entering the rest of the Field Names and Data Types as follows:

Field Name Data/Type Field Size
Points Number Integer
Grade Text 2
DateEnrolled Date/Time not applicable

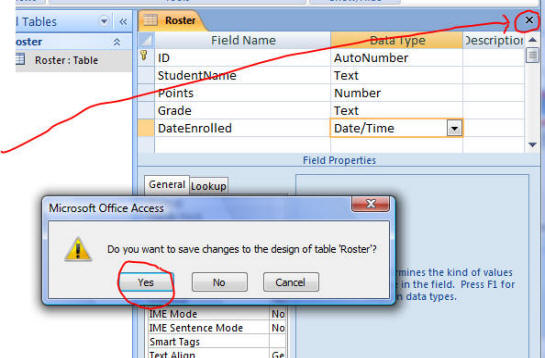
  • Once you have finished entering the fields, click the close icon at the top right
  • When the "Do you want to save the changes to the design of the table Roster?" dialog box appears, click the Yes button

STEP 2 - Creating a Form and entering records:

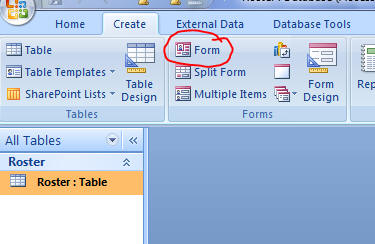
  • Select the Create tab on the ribbon and then click the Form button
  • Note: If the Form button is grayed-out, click the Roster:Table to select it
  • Bring up the Roster table in the Forms Layout View
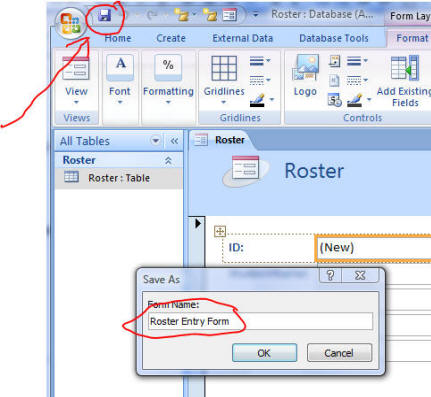
  • Click the Save icon
  • Name your form Roster Entry Form
  • Click the OK button
  • Click the Roster Entry Form to select it
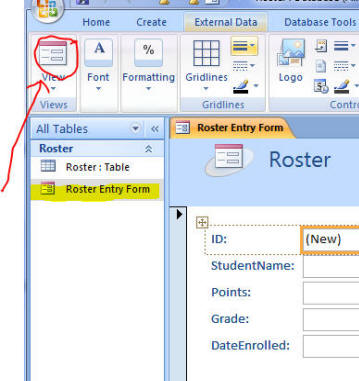
  • Click the Form View button to enable the Form for entering data records
  • Press the <Enter> key to skip to the StudentName field
  • (Note: Access will automatically assign the value "1" to the ID field of the first record.)
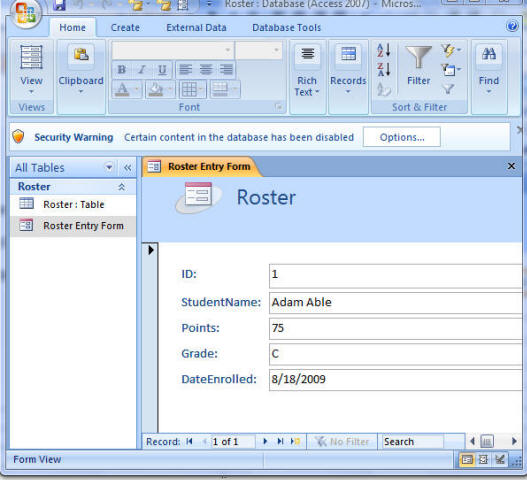
  • Type Adam Able in the StudentName field
  • Press the <Enter> key
  • Continue to enter the rest of the fields for the first record:

  • Points: 75
    Grade: C
    DateEnrolled: 8/18/2009

  • When you press the <Enter> key after typing in the DateEnrolled, the form will advance to the next record
  • Continue to add data for the following five records:

  • StudentName Points Grade DateEnrolled
    Betty Bloom 93 A 8/11/2009
    Chanti Chen 68 D 8/20/2009
    Dewy Duck 85 B 7/23/2009
    Ewardo Enos 88 B 7/23/2009
    Freddie Forget 59 F 8/22/2009

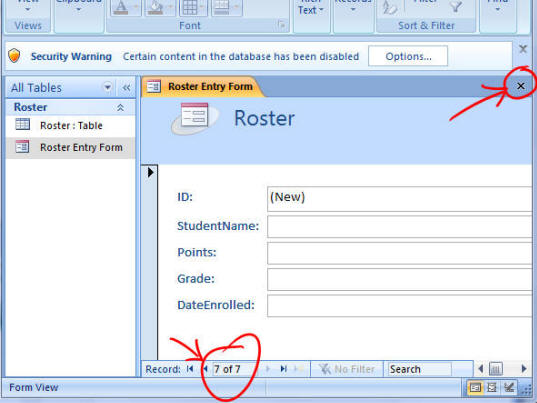
  • When you have entered all six of the records and the form comes up for record seven:
  • Click the Close button (the X at the top right of the Form window) to close the Roster entry Form
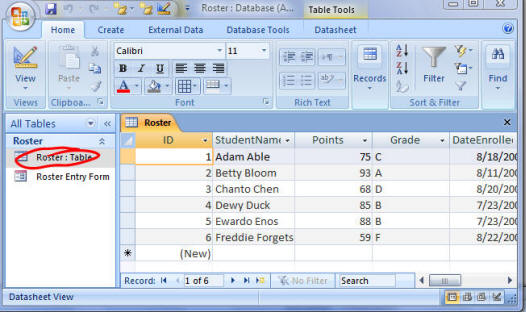
Double-click the Roster:Table to bring up the table in datasheet view.

You will see the six records you have entered for the Roster table.

  • Click the Close button to close the Roster table

STEP 3 - Creating a Query for all fields of all records:

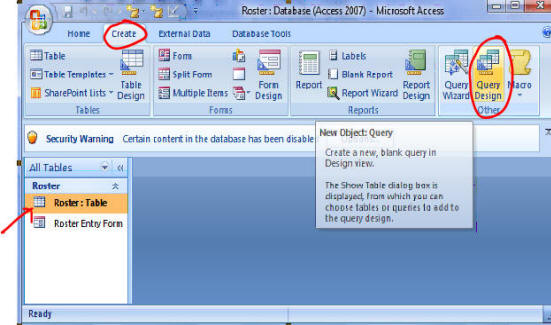
  • Select the Roster: Table
  • Open the Create tab
  • click the Query Design button.
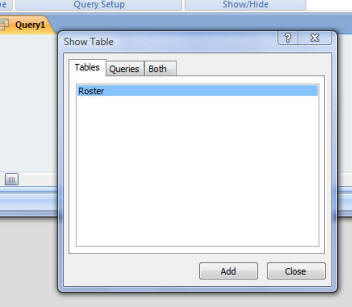
When the Show Table dialog box appears:
  • Click the Add button
  • Click the Close button
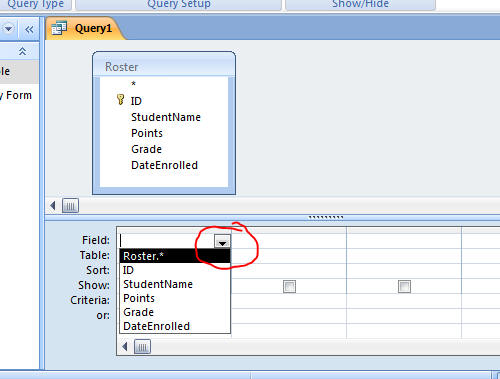
Note that Query 1 now has the Roster table field names displayed at the top and a column template for listing fields for the query.
  • Click the dropdown arrow on the first column
  • Click the Roster.* choice to list all of the fields on the Roster table
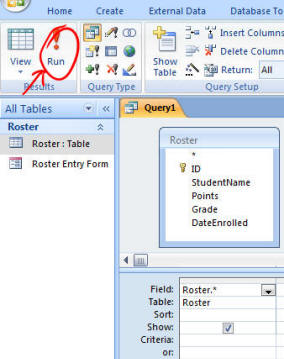
  • Click the Run button to run the Query and display the results
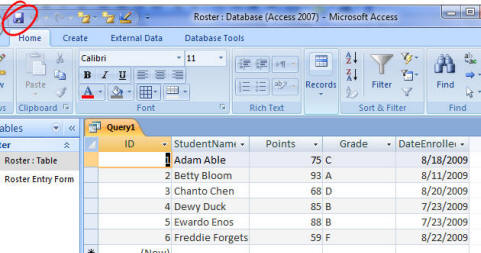
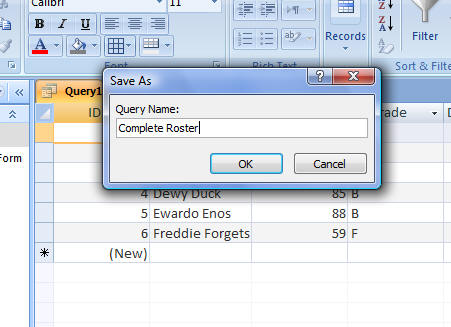
  • Click the Save button and name the query Complete Roster
  • Click the OK button
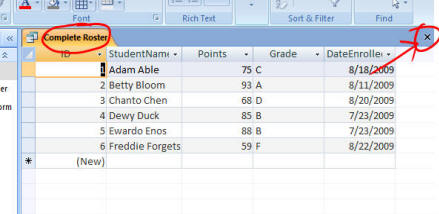
Note that the query tab has been renamed Complete Roster.
  • Click the close button
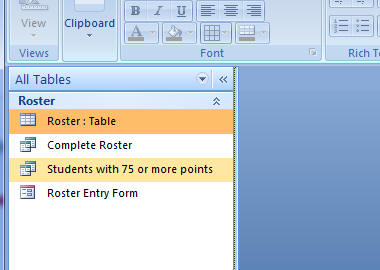
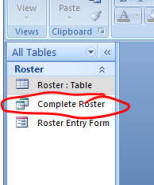
The Complete Roster query is now listed in the object window.

STEP 4 - Creating a filtered Query to only list Students and Grades who have Scores Greater Than or Equal to 75:

Repeat the actions in Step 3, to imitate the Query Creation:
  • Click the Query Design button
  • Add the Roster table
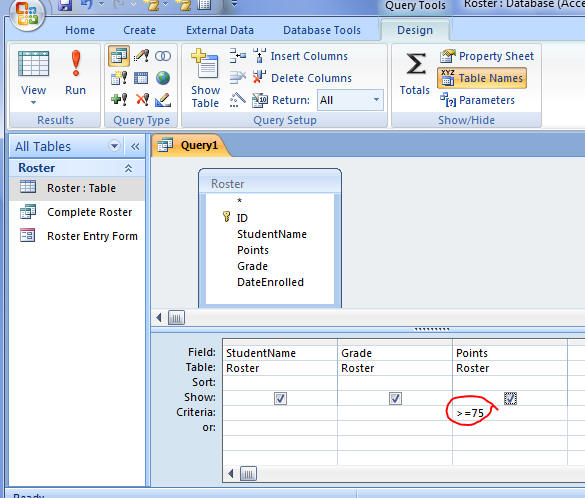
  • Use the dropdown arrow at the top of each column to select the StudentName, Grade and Points fields
In the Criteria row of the third column (Points):
  • Type >=75 to tell Access to select only records where the Points are greater than or equal to 75
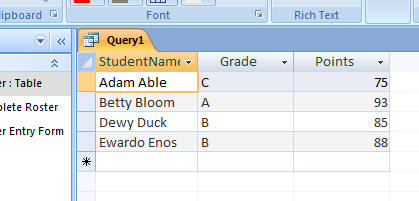
  • Click the Run button to execute the query
Note that only the Studentname, Grade and Points fields are shown and that only four of the six records, those students with a score of 75 or more are listed.
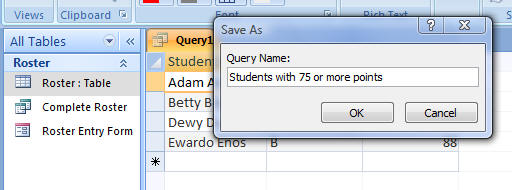
  • Click the Save button
  • Name the query Students with 75 or more points
  • Click the OK button
The Students with 75 or more points query is now listed in the object window.
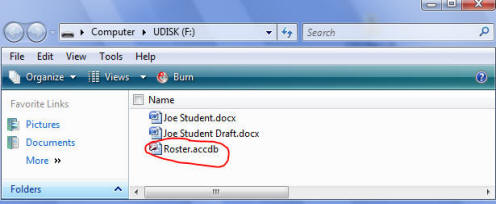
  • Close Access and look at the files on your flash drive
  • The Roster.accdb file is the Access application file that contains the table, form and queries that you have just created
Return to 110 Examples Page